Tuesday, May 16, 2017

A Special Graduation

My daughter is graduating from high school this year! One would think by child number three that I would have all of these emotions in check, but each one has their own little special reason for making this big event a new experience. 

Besides being my talented artist child, who can spend hours with me in the studio, we share a special bond over her years of scouting. I've been her troop leader since kindergarten, and the few girls who are still in our troop have been together for over ten years. They've had many wonderful adventures together over the years, from giant spiders, to skyscrapers, to meeting the First Lady, to a grand tour of Europe! And these amazing young ladies are launching into the world this year. I couldn't be more excited and proud of them, and weepy about the time that has passed. 

The moment I saw the tee-shirt builder suite in the Spring Occasions catalog, I knew instantly what I was going to make for the girls graduation cards. That sash just cries out for some Girl Scout badges!


So I tinkered around with some of the buttons, stripes and other bits of the stamp set to build it. 


Of course, since this was a special occasion, I wanted to make the card extra special. I had been seeing all the lovely mechanical cards so I decided to give it a try. I had photos of the girls through the years so I picked a few from our biggest adventures to put on the panels. I was quite pleased with the results. 


I also featured this card fold at my May Stamp and Sip, with a more general decor scheme. It also turned out quite lovely. 


Here are the instructions for the mechanical fold. 

Start with a base of cardstock cut 4 1/4" by 11" and score at 5 1/2". Don't fold it yet, it's easier to work with when its flat. 

For the four panel insert, cut a piece of cardstock 3 1/2" x 10" and score at 2 1/2", 5", and 7 1/2". 


Fold a valley, a peak, and a valley. Decorate with mats of 3 1/4" x 2 1/4" paper. My photos were 3 x 2. 

For the mechanical peice, cut a 8" x 3 1/2" peice of card. Carefully mark both long edges at 2 1/4" and 5 3/4". If this measurement is off even a little bit, your card won't fold correctly. 

Score down the length at 1 3/4", and score on the diagonal between each marking. 


Fold along the scores. Fold lengthwise, then fold the diagonals so that the lengthwise "peaks" are facing each other under a triangle. 


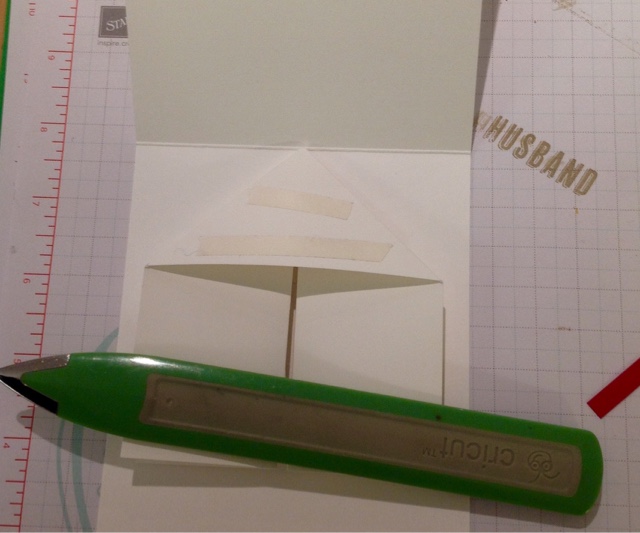
Add tear tape to the triangle and adhere one side right in the center and nudge the point of the triangle just up to the fold of the base. Then adhere the other side by adding the tear tape to the triangle and then folding the card front onto it. That way you know it will lay flat and is stuck to the correct spot. This is the mechanical peice that will make the four panel piece unfold when the card is opened. 

Now take your four panel peice and hold it open and upside right. Fold it closed (valley, peak, valley). You should now have a "book-like" set with blank covers. Take the left side closed four panel peice and slide it under the mechanical piece's left "peak" and adhere the two together. 


Then adhere the right side to the top of the right mechanical peice


The panel piece will be crossed between the two mechanical flaps. 


Decorate the front as desired. Make a slider band with a 10" x 2" piece of DSP folded to size around the card and adhered in the back. 

There you go! A real WOW card for someone special!


Celebrating Dad

Now that Mother's Day has passed we turn our attention to making sure Dad has his own special day. My kids are lucky in that their Dad can fix almost anything. From refurbishing classic cars to remodeling our entire home, the Dad in our family is always working on a project. That's why the Nailed It suite from Stampin' Up! is perfect for our Fathers Day cards. 

I was so excited to win this stamp set as a prize patrol at On Stage Local last fall. But I was super bummed when I went to order the matching framelits in May only to discover they were sold out! As in gone. Forever. I learned my lesson; when I plan classes around sets in our mini catalogs, order them right away, not just in time. And that's a good lesson for all of us; if we love it, get it!  

Aaannyy way, I put out a desperate plea to my sister demonstrators and someone nearby was able to loan them to me so our class could go on. I'm so glad, because look how great these cards turned out!


I love this one because I can replicate it without the framelits. 

And, fun tip, when making random background patterns like I've done here, just put all the stamps on one block and stamp once. 


Now, here is the card I really had in mind since I first saw (haha, get it, saw?) the set in November. 


It looks very complex, but it's a simple box card. Just take a 4 1/4" x 10 1/2" peice of red cardstock. Score on the long, horizontal at 2 3/4". Then score on the short, vertical at 1/2", 2 1/4", 5 1/4", and 7 1/4". Cut away to make a tab on the 1/2" section, and above the horizontal line between the 2 1/4" and 5 1/2" scores as shown in the photo. 


Fold on the score lines to form a box, and adhere the 1/2" tab to close. 

Cut two 4 1/4" x 1" pieces of red card stock and score one half inch on each end. These will get adhered to the inside of the tool box to hold the tools. 

Cut two 3 1/4" x 1" peices of red cardstock and adhere to the front of the toolbox as drawers. 

Cut one 3 x 3 1/4" peice of designer paper (I actually used aluminum foil here) to make the back mat. 

Stamp, cut and decorate the the tools and greetings as desired and add to box. 

Voila, a perfect card for a handy Dad! 

Thursday, May 11, 2017

Finding the squeak!

I have new kicks! They are so pretty and I love that they match a lot of my running clothes, because nothing motivates me to get off my butt and exercise than cute, matchy-matchy outfits. But I have to tell you a somewhat long story about why I would write a post about my shoes. 


So I'm a runner. But let me be clear, I don't "like" running. But I do like food, and fitting into my clothes, and, as I learned in 2013, I like medals! As in the kind you get when you run a race, or as my lovely son calls them, participation medals. But I don't care, those little hunks of metal on a pretty ribbon are the most beautiful thing after so much hard work. 

Anyway, late last year, I developed soft tissue injuries in both of my feet. At first I thought it was my new shoes, so I went back to my old shoes. That didn't help, so after a few months of suffering, I broke down and went to the podiatrist. I didn't particularly agree with his diagnosis, but I followed along and wore the compression socks, the boot, physical therapy, blah, blah, blah - even dry needling, which is a special kind of torture IMHO. But none of it worked. After several months, a lot of money, and worsening pain, I went back. The doctor had one of those aha moments, when they finally hear what you've been saying and changed the diagnosis. I was fitted for custom orthotics (that I didn't want because I'd rather spend that money on travel or craft supplies) and sent on my way. 

I also did a lot of online research and found some shoe recommendations, and proceeded to spend a rediculous amount of time trying on different kinds. I finally found some I like, but managed to buy a pair two sizes too big. I exchanged them for the correct size in a slightly different model, and saved $60! My custom insoles arrived and I went for a run. I'm not saying it was a miracle, but my feet were a thousand times better. Still need to heal a bit more but, I'm very excited that after months of pain, and searching for a solution, I've finally turned the corner. 

So you can imagine my distress the other morning when I put on my awesome new kicks on my way to work and they squeeked! Not just a little squish, but for real, that annoying clownish squeek.  Several times, I readjusted the insoles, and nothing worked. I even tried it without the insole, squeeeek. I wanted to cry. Seriously, one more trip to the mall was more than I could mentally bear. 

Dejectedly, I sat down to take them off and put them back in the box. As I carefully, and whist fully removed them, I brushed my hand on the bottom of the offending shoe and felt it. A peanut! It was wedged in the sole. I removed it, put my shoe on, no squeek! What a relief, and a lesson. Sometimes the squeek is not what you think it is. Be careful before giving up. I've been running three times in these new shoes, they are great, and the insole has worked wonders. 

Mother's Day

One of the challenges of sharing my designs online is being careful not to spoil the fun for someone special that might be receiving the item soon as a gift. And so it goes with Mother's Day! These projects were featured in my April Stamp and Sip, but I've been holding off posting them until my Mom received her gifts.

On a positive note, although this Oh So Succulent suite will be retiring soon 😩, I know those of you who own it will be pulling it out to create with for years to come, so these ideas may come in handy down the road. Or even this week, as there are a few more days before we celebrate Mom. 

I don't know about you, but I spend a lot of time at craft stores! I'm always looking for inspiration. This plain, $1 wooden frame was an Easter special. I think I got it for 60 cents on sale. Well, add some pretty paper, a few flowers, and voila, a quick gift for mom. I traced the frame on the back side of the paper, then cut it out, and used spray adhesive to glue the paper on. 


And of course, Mom needs a lovely card. I made the background design by stamping randomly on cardstock with a monochrome color. This makes every card one of a kind.

And you have to love the faux succulents in a 3D project. So realistic looking. 


Here are the color combinations we used to shade the succulents. Listed from top right to bottom left. 


1) Garden Green cardstock shaded with Mossy Meadow and Raspberry Ripple ink
2) Mint Macaron cardstock shaded with Raspberry Ripple ink
3) Pear Pizazz cardstock shaded with Raspberry Ripple ink
4) Old Olive cardstock shaded with Old Olive ink and just a touch of Whisper White 

Want to know the perfect Mother's Day gift? How about a Paper Pumpkin subscription? You can order one, three, or twelve months online and wrap up the redemption code as your gift! Great for last minute ideas. Mom will love the crafty Surpise in her mailbox every month. 

And starting today, new subscribers get 25% off their first 3 months of you use the promo code "STARTHERE", good through June 10, 2017. 


Wednesday, May 3, 2017

DIY Embossing Folder

I'm excited to share a new possibility; DIY embossing folders! I know it's hard to see in a photo, but do you notice the textured background on the Bermuda Bay mat? It's dry embossed, but you won't be able to buy that embossing folder, because I made it just for this card! I've given instructions below, so you can make your own embossing forlders too!


Start by choosing the framelits and thinlits you want to use in your design. I have some from mulitple sets here. Grab the sheet of heavier white card stock that comes in the back of each package of Designer Series Paper. It's just the right thickness, and it won't go to waste anymore. Trim the cardstock down into two pieces of the size folder you are making. I did a standard 4 1/4 by 5 1/2 here, but really you could make any size and shape, as long as it fits through your big shot. 


Run one sheet of the cardstock through to cut out the shapes in the design you want. Keep the cut outs, you are going to use them in a minute.  


Now take some washi tape and place it at the top of the cut design sheet, with half of the width hanging over. Adhere the second sheet to that extra half of the tape and fold the two into a "folder."


Now that you have your folder, close it and carefully glue the cut outs onto the uncut sheet. The trick to doing this is to close the folder and glue the shapes right through the holes they made. Just be careful not to use so much glue that it oozes out and glues the whole thing together. I like to use a sponge and some tacky glue to get a light layer. Did you notice the fine use of the binder clip to keep my hands clean? Clever, huh?


Now when you open the folder, you will see how the folder is going to work. Just slide your paper in, close the folder, and run it through the big shot using the regular "sandwich" you would use to cut the framelits out.  This will give you enough pressure to emboss the paper, because the folder is a little hinder than a regular embossing folder.  


And voila! 


Now you have a unique designed folder, talk about the personal touch for your cards! 

I would  love to see what you've designed with this technique.  Leave a comment below with a photo of your card!