Besides being my talented artist child, who can spend hours with me in the studio, we share a special bond over her years of scouting. I've been her troop leader since kindergarten, and the few girls who are still in our troop have been together for over ten years. They've had many wonderful adventures together over the years, from giant spiders, to skyscrapers, to meeting the First Lady, to a grand tour of Europe! And these amazing young ladies are launching into the world this year. I couldn't be more excited and proud of them, and weepy about the time that has passed.
The moment I saw the tee-shirt builder suite in the Spring Occasions catalog, I knew instantly what I was going to make for the girls graduation cards. That sash just cries out for some Girl Scout badges!
So I tinkered around with some of the buttons, stripes and other bits of the stamp set to build it.
Of course, since this was a special occasion, I wanted to make the card extra special. I had been seeing all the lovely mechanical cards so I decided to give it a try. I had photos of the girls through the years so I picked a few from our biggest adventures to put on the panels. I was quite pleased with the results.
I also featured this card fold at my May Stamp and Sip, with a more general decor scheme. It also turned out quite lovely.
Here are the instructions for the mechanical fold.
Start with a base of cardstock cut 4 1/4" by 11" and score at 5 1/2". Don't fold it yet, it's easier to work with when its flat.
For the four panel insert, cut a piece of cardstock 3 1/2" x 10" and score at 2 1/2", 5", and 7 1/2".
Fold a valley, a peak, and a valley. Decorate with mats of 3 1/4" x 2 1/4" paper. My photos were 3 x 2.
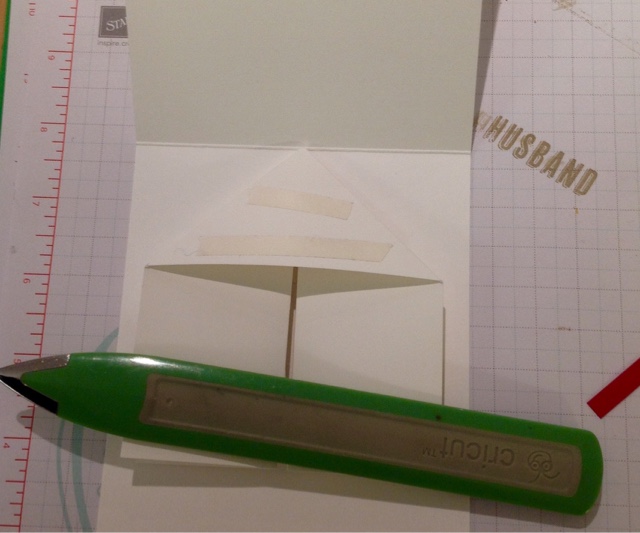
For the mechanical peice, cut a 8" x 3 1/2" peice of card. Carefully mark both long edges at 2 1/4" and 5 3/4". If this measurement is off even a little bit, your card won't fold correctly.
Score down the length at 1 3/4", and score on the diagonal between each marking.
Fold along the scores. Fold lengthwise, then fold the diagonals so that the lengthwise "peaks" are facing each other under a triangle.
Add tear tape to the triangle and adhere one side right in the center and nudge the point of the triangle just up to the fold of the base. Then adhere the other side by adding the tear tape to the triangle and then folding the card front onto it. That way you know it will lay flat and is stuck to the correct spot. This is the mechanical peice that will make the four panel piece unfold when the card is opened.
Now take your four panel peice and hold it open and upside right. Fold it closed (valley, peak, valley). You should now have a "book-like" set with blank covers. Take the left side closed four panel peice and slide it under the mechanical piece's left "peak" and adhere the two together.
Then adhere the right side to the top of the right mechanical peice
The panel piece will be crossed between the two mechanical flaps.
Decorate the front as desired. Make a slider band with a 10" x 2" piece of DSP folded to size around the card and adhered in the back.
There you go! A real WOW card for someone special!


No comments:
Post a Comment